Do you want to learn the complete process of knitting? If yes, then this blog is perfect for you! If you are a beginner knitter, then choosing needles and yarn might seem threatening. But don’t worry, it’s not as difficult as it looks. In fact, when you get the hover of it, knitting can be a relaxing activity for you. This complete guide will teach you how to knit from the beginning. Once you read this post, you will easily start knitting your first projects.

A Complete Introduction to Knitting
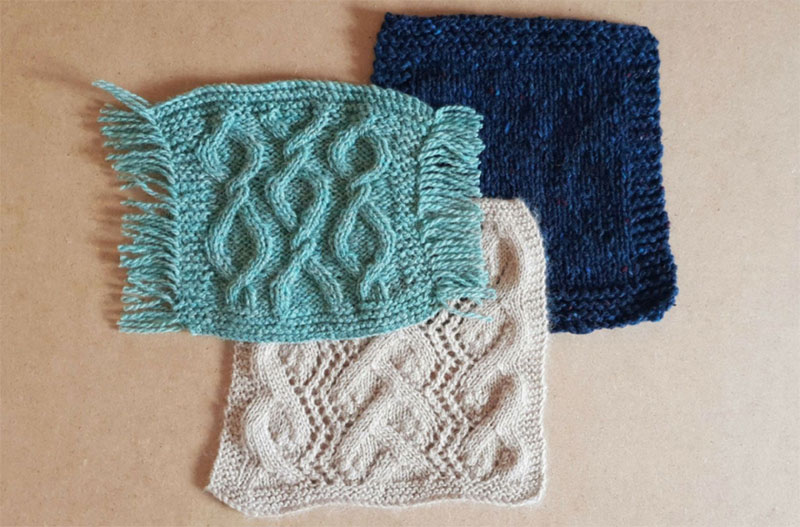
Knitting is the most famous craft that has been for centuries. It’s a process of creating interlocking loops of yarn with needles to make fabric. While knitting can be completed with a machine or with a hand, most knitters consider knitting by hand. By merging the knit stitch and the purl stitch in different ways, the knitter can easily create many textures like cable, ribbing, and lace.
Is The Process of Knitting easy?
Yes! The knitting process is relatively easy to learn; even if you have never knit in your entire life, you can still learn the basics within a few hours. Once you learn the basic stitches, you are able to create all sorts of projects, from simple mufflers to more complex blankets.
What Should We Need to Start Knitting?
As you know, knitting is relatively accessible, and you don’t need any fancy supplies to start. With some yarn and needles paired, you can start the knitting process. Also, you may need other supplies like scissors, a tape measure, a tapestry needle, and a project base to store everything.
What Is The Simplest Thing To Learn To Knit?
You can begin with something small and easy such as a garter-stitch scarf if you are a beginner. Once you learn the basics, you are able to move to more complex projects.
How to knit?
In this section, we will discuss the basics of how you can knit. Firstly, you will need a few knitting supplies for your project. Then you will see a process of how to hold your yarn and needles, how to create the basic stitches, and how to cast on and cast off. Read the section below to find the answer to all of these questions.
Knitting Supplies you will need
- Yarn: beginners have to select a light-colored yarn in a medium to bulky weight so that you can see their stitches and keep track of their evolution. When looking at yarn labeled “Worsted Weight Yarn” or “Chunky Yarn.” You can knit with wool yarn and acrylic – either fiber content is fine, but I would caution you to stay away from novelty yarn and anything bumpy and lumpy.
- Knitting Needles: Beginners should pick up a pair of bamboo or wooden straight needles for their first project. These needles are lightweight and super easy to work with. They also have a little more grip than metal needles, so you won’t need to stress about slipping off your stitches. When shopping for these needles, make sure to choose the right size for your yarn. Also, you have to check the back side of the yarn label to see which needle size it considers.
- Stitch Markers: Stitch markers are small rings that help you keep a record of your place in a pattern. You may not need them for your practice swatch, but they will come in handy for your first project. You can easily find the stitch marker in any craft store.
- Tapestry Needle: A tapestry needle is a blunt and large needle used to braid loose ends and sew together pieces of knitting. Different varieties of tapestry needles, such as bent tips, straight tips, plastic, and metal, are easily available at most craft stores. When shopping, select a tapestry needle with a large enough eye that fits your yarn.
- Scissors: You will also need a scissors pair to cut your yarn. Any pair of scissors will do the same work, but if you want to keep it in your project bag, pick up a small pair of scissors.
- Other Supplies: You might also want some other supplies like a notebook to keep a record of your pattern, tape measure to measure your swatch, and a project bag to store all the knitting supplies.
How to Hold your Needles and Yarn
- Needles
Once you have gathered all the knitting supplies, you can start knitting! This section will show you the perfect way to hold your needles.
- The first way to hold your needles is the “Overhand Method.” To do this, hold your needles with your palms facing down. Hold the needles the same as you hold a knife and fork at dinner.
- The second method to hold the needles is the “Underhand” or “Pencil Grip.” To do this, hold the needles between your index fingers and thumbs as if you were holding a pen and pencils.
- Some knitters hold it with a combination of two grip styles like they hold the right needle in an altered underhand style and the left needle in an overhand grip. Also note that there is actually no correct or wrong way to hold the yarn needles, as long as you are convenient or comfortable and enjoy knitting.
- Yarn
Now that you know the perfect way to hold your needles, it’s time to learn how to hold the yarn. In the below section, the two common ways to hold it.
- The first method is called the English or American Style Method. In this, you will hold or grip the yarn in your right hand and then wrap it around the needle with your right hand. This method is also known as flicking or throwing because the knitters throw the yarn around the needle.
- The second method is called the Continental Method. In this method, you will hold or grip the yarn in your left hand and grab the yarn from your left index finger by using your needle. This method is also known as picking because you use the needle tip in order to pick the yarn from your left index finger.
Which Way Do Beginners Have To Learn?
- Most beginners in the US and UK want to learn knitting using the English style method. Beginners might find it easier to control their stress when they hold the yarn in their right hand.
- On the other hand, many expect the continental-style method to be faster on knit rows. And it also makes it easier to switch between purl and knit stitches, which comes in handy when knitting ribbing.
Here Are Some Things To Consider
- If you already know the process of crocheting and are used to holding or gripping the yarn in your left hand, then you might consider the continental style to learn.
- If you are left-handed, you might discover it easier to hold or grip the yarn in your left hand. But there are so many lefties who knit in the English style.
What is Cast On, and How to Make a Long Tail Cast On?
After learning how you can hold the yarn and needles, you can start the knitting process. This section will teach you what is cast on and how to make it on your first stitches.
What is cast on?
Casting on is the procedure of creating your stitch’s first row. There are various unique casts on techniques, and every method creates a unique look. Few cast-on techniques make a sturdy edge and firm, while some either creates a stretchy and flexible edge.
How To Make A Long Tail Cast On?
- Firstly, measure out a yarn length that’s 3 to 4 times as long as the project width.
- After that, tie a slip knot. To do this, create a loop and pass the tail end. Then, grab the tail yarn, tug it through the loop, and tighten it.
- Then, place the slip knot on the needle so that the tail of the yarn is closest to you. Simply hold the needle with your right hand and hold the slip knot in place with your right index finger.
- Next, grasp both yarn strands with your left hand. To do this, put your index finger and thumb between the two yarn strands and then spread them separately. Tilt your hand back to make two yarn loops – one around your hump and one around your index finger. The loops should form a “Slingshot” or “Y” shape.
- After that, swing the needle tip under the outside yarn strand on the thumb and up through the middle of the thumb loop.
- Swing the needle up and over the interior yarn strand on the index finger, catching the strand.
- Release the loop from the thumb. Just spell slightly on the two yarn strands to tighten up the loop on the hook. Now you finally made your first cast-on stitch.
- Now, you can repeat all the above steps in order to cast on as many stitches as you want.
Making the Basic Knit Stitch
The knit stitch is the most basic of all stitches, which is used for almost every project you knit. So here is a step-by-step guide to making a stitch.
- Firstly, hold or grip the needle in your left hand along with the cast-on stitches and the blank needle in your right hand. Then, Hold the working yarn to the back of the work.
- Then, insert your right needle into the first stitch from left to right on the left-hand needle. The right needle has gone under the left needle, via the middle of the first stitch, from the front side to the back.
- Next, pick up the working yarn in your right hand and then wrap it around the right-hand needle in a clockwise direction. This will make a loop of yarn on the right-hand needle.
- Then, use the right needle in order to draw the yarn loop through the stitch on the left needle. Take it as a sliding motion to pull the new yarn loop under the left-hand needle and through the middle of the stitch. In the end, the right-hand needle will be in front of the left-hand needle, and there will be a yarn loop on the right needle.
- Lastly, slide the right needle up so that the stitch slips off the left needle. Now, you can repeat these steps until you knit all the stitches on the left-hand needle.
Turning your work
- Once you have completed your first row of knitting, now it’s time to turn in your work and start the next row. In this step, the left-hand needle will be blank, and the stitches will be on your right-hand needle side.
- In order to turn your work, exchange the needles around so that you can easily hold the needle along with stitches in your left hand, and the blank needle in your right hand.
- After that, you are ready to knit the next row. So keep knitting until your swatch is as long as you need it to be.
How to Cast off (aka bind off)
When you practice swatching as long as you would want, it’s the correct time to get those stitches off the needles. This procedure is called casting off, which is also known as binding off. The cast-off process helps to secure the edges of your work so that it doesn’t clear up. Like the “Cast on” term, the “Cast off” term does not refer to a particular technique but a whole family of techniques you can use to complete your last row of knitting. Below, you will see a step-by-step guide on how to cats off:
- To begin, knit the first two stitches on your needle. You have to keep your tension relatively loose so that your cast-off does not become too tight.
- After that, put the left needle into the first knit stitch.
- Then, lift the first stitch using the needle tip and let it drop off the needle. Now, on your right-hand needle, you will have one stitch remaining.
- Now, knit the next stitch on your left needle. Then you should have two stitches on your right-hand needle.
- Lastly, lift the right stitch over the left stitch by using the left-hand needle. Now you have cast off another stitch, so now you can repeat the steps until you have only one stitch on your right-hand needle.
Finishing off
Now it’s time to finish the last stitch. To do this, cut the yarn, then leave a 6-in tail to braid in later. Thread the yarn tail via the stitch, drop the stitch from the needle, and tug on the yarn tail to tighten. Lastly, weave in the yarn tail to protect it.
How To Take Care of The Yarn Tails (Weave in The Ends)
Once you have completed casting off, you will have to take care of the yarn tails. This process, known as weaving in the end, averts your knitting from unraveling. To start weaving in the ends, you have to thread a tapestry needle with yarn tails. After that, wave every tail via the fabric material on the wrong side so that it’s not muchly makeable.
About Purl Stitch
The purl stitch is the primary stitch in the knitting process, and it is usually the second stitch that learners can learn. At the first time, It might seem a bit intimidating, but with a little practice, you will easily pick it up.
Purling is the best skill to learn, and also it’s necessary for many patterns, such as stockinette stitch, ribbing, and moss stitch.
More knitting Stitches for Beginners
Once you have learned the procedure of knit and purl stitches, you are now ready to begin exploring a few more stitch patterns. Below are some more stitch patterns for beginners. Let’s check it out to learn.
- Garter stitch: this stitch is created by knitting each row. This impacts a stretchy fabric that has a slightly ridged surface.
- Stockinette stitch: this stitch is made by alternating a knit row along with a purl row. This results in a fabric that is too smooth on only one side and has a slight surface on the other.
- Seed stitch: this stitch is made by alternating between knitting and purl stitches inside the same row. This results in a fabric that comes with a textured surface.
Final Words
In this detailed read above, you will see a step-by-step guide on how you can start knitting. Also, you will see all the basics which are important to learn. This entire blog will cover how to hold your needles, cast on, and cast off. By the time you complete reading this post, you will be ready to begin knitting your first project.


