Cricut has recently launched a super cool tool called Cricut Foil Transfer System. Cricut has introduced many new tools for Cricut Maker crafting machines, so the Cricut Explore users can also use the brand-new Cricut Foil Transfer Tool. It is compatible with every device in the Cricut Maker and Cricut Explore family. You can even use it with your older Cricut Explore machine. This comprehensive tutorial will teach you what Cricut Foil Transfer Tool is. How does it work? And how is it different from other foil tools? Also, you will know the inspiration for fun projects you can create with it.
What is the Cricut foil transfer system?
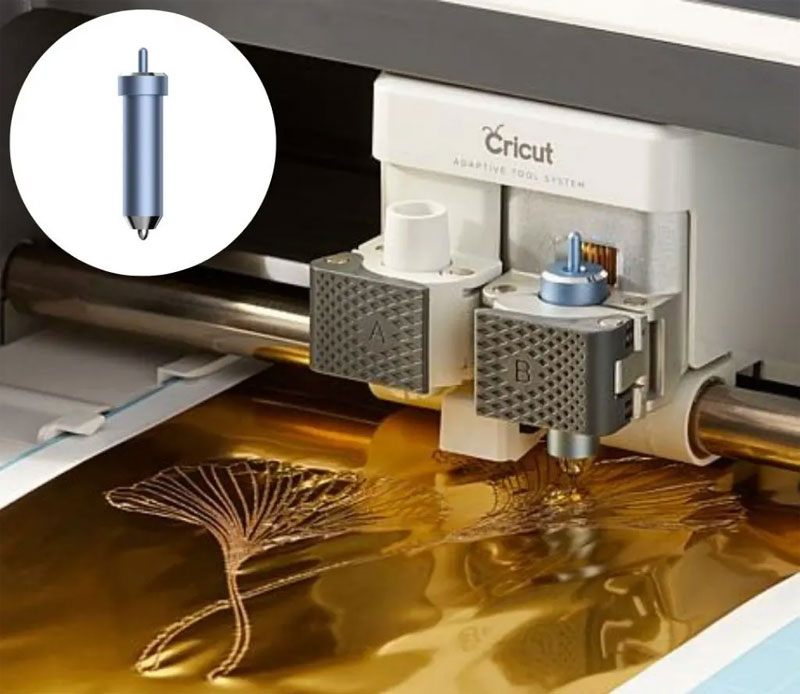
Cricut has created the Foil Transfer System with two significant components Foil Transfer Sheets to give shiny foil accents to users’ projects and the Cricut Foil Transfer Tool. The Foil Transfer Tool has three (medium, bold, and fine) interchange tips that provide a range of line weights on various materials.
The Foil Transfer Sheets are presently accessible in two sizes: smaller 4 x 6 sheets of silver, gold, purple, emerald, and aqua and large 12 x 12 sheets of silver and gold. The Cricut Foil Transfer System utilizes a distinctive pressure system to activate the foil & transfer it to users crafting material.
Within the Foil Transfer kit, you will get the Foil Transfer Tool with twelve 4 x 6 sheets of foil, three different tips, and strips of specially formulated tape that users use to hold the foil in place. The Foil Transfer Tool features a button at the top, which enables users to be simple and quickly swap out the multiple tips. Every tip connects to the interior of a tool covering magnetically, so it is easy to replace and remove as required.
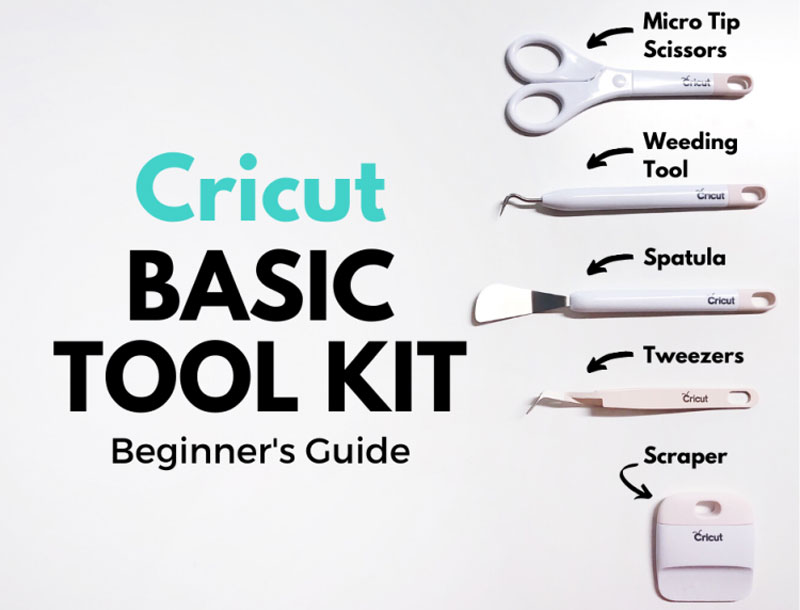
Also Read: How to Use Flatten Tool in Cricut Design Space
Cricut has marked the three tips with lines at the bottom to differentiate them, a single line for a fine point, a double for a medium point, & three for bold.
Materials Compatible with Cricut Foil Transfer Tool
The Cricut Foil Transfer Tool works with a variety of materials, such as:
- Kraft board
- Cardstock
- Faux leather
- Printable vinyl
- Photo paper
- Vellum
- Poster Board
Some notable materials that aren’t compatible are leather and fabric. You can check out the complete materials list on the official Cricut website.
How to Use the Cricut Foil Transfer System
Using the Cricut Foil Transfer tool is quite simple and safe.
- Design the project in the Cricut Design Space software.
- Insert the Foil Transfer Tool and suitable tip into the Cricut machine.
- Stick the Cricut Foil Transfer Sheet to a base material, hit the button, and let your machine perform its magic.
Let’s begin with an example of utilizing the Cricut Foil Transfer Tool to create a foil greeting card. Proceed with the sheet of cardstock on a Cricut mat.
- Put the Foil Transfer Tool into the B tool holder of your Cricut machine. For instance, use the Scoring Stylus in the A holder to make a greeting card.
- Then, select a design ( for example, Missing You Card) in the Design Space software. Set the design to Foil in the Linetype menu in the top toolbar. If all looks perfect, tap on the Make It tab in the upper right corner of the screen.
- Place the design on the Cricut mat far from the edges. The Cricut Foil Transfer Sheets function best if you leave up to 1/4″ margin between the foil edges and the edges of the design; also, you require a small space to tape the foil to the material. If you cover any part of your design with tape, the foil of that part won’t transfer correctly.
- Choose the base material; for example, use heavy cardstock, and put the mat into your Cricut machine. In the left-hand sidebar panel, you will find the order tab in which tools users can use; the first is the scoring stylus, the next is the Foil Transfer Tool with a fine tip, then the bold tip, and lastly, the standard cutting blade. Hit the blinking Cricut button on your Cricut machine, and the scoring stylus will generate the score line for folding your card.
- After that, you should crop the Foil Transfer Sheet to change the size (slightly bigger than the design, but smaller than your base material), and cover the foil with tape (shiny side up) to the base utilizing the given tape strips. Don’t remove the mat from your machine. Ensure the foil is taught, smooth, and secured on every side.
- Next, hit the Cricut button to start foiling.
- After completing the foiling procedure with the fine tip, the machine will pause, and the software will ask you to change the fine tip to a bold tip. Then, remove the Foil Transfer Tool from the B carrier, change the tip, and change the tool in your machine. Don’t remove the cutting mat from the device.
- After finishing the foiling procedure, carefully peel off the tape and remove the Foil Transfer Sheet to show your beautiful foil design.
- Exchange the Foil Transfer Tool with the Fine-Point Blade and cut your card.
What Makes Cricut Foil Transfer System Different from Other Foil Tools
Plenty of other foil tools are available in the market, but none is as versatile or as simple as the Cricut Foil Transfer Tool. The other foil tools utilize heat for foil effects (users need to wait longer for their tool to heat up and operate a particular plate to secure the machine from melting). But, the Cricut Transfer System uses a distinctive pressure-activated system to create attractive foil effects with less effort and time.
Heated foil tools utilize the A tool carrier of the Cricut device, which means the tool will draw a single “draw” linetype, and you must purchase various tools for differing line weights. Suppose you wish to utilize the heated foil tool in your project design with multiple line weights. In that case, you will need to perform some hacks during the design procedure to make it work effectively, and you will have to wait for every tool to heat up before switching to the next set of lines.
The Cricut Foil Transfer Tool utilizes the B carrier with easily interchangeable tips (bold, fine, and medium) & pressure-sensitive foil to rapidly infuse the material with glitter foil effects in a fraction of the time. Since the Cricut Design Space has integrated clamp B fully, you can design your project with the three foil line widths, simple and no hacks required.
Also Read: How to Weld Text and Images in Cricut Design Space
Also, with the heat-free foil transfer, you can avoid accidentally melting your machine.
Usage of Cricut Foil Transfer Tool
The Cricut Foil Transfer Sheets function with various base materials such as cardstock or paper, kraft board, suede, faux leather, printable vinyl, and vellum. You can create anything you desire with those materials. Gift bags, boxes, and gift wraps are the best way to include glam and glitz on a particular occasion.
The foil gift tags are super quick and straightforward to create, elevate your gift and provide something unique. Foil Art Prints are famous these days and for better reasons. Who would not need to hang something eye-catching and glittery in their home? You can use different colors of foil in a single art piece.
The fun foil doodle bookmarks could create an attractive reward incentive for the little readers. You can do plenty of great projects with the Foil Transfer System.
Final Verdict
Cricut Foil Transfer System is an effective tool that enables crafters to include foil details in their projects. It fuses and transfers colored foil accents onto your project surface—the tool slots of your Cricut devices (like a blade). The Cricut Design Space software handles the slots so that users can utilize it smoothly with other Cricut tools to score, perforate, cut, deboss, engrave, and now foil the makes. To know more about the Foil Transfer Tool, you can read the above-detailed tutorial and learn how to use it to make different projects and other information about it.